Showing posts with label Block of the Month. Show all posts

Sunday, November 20, 2022

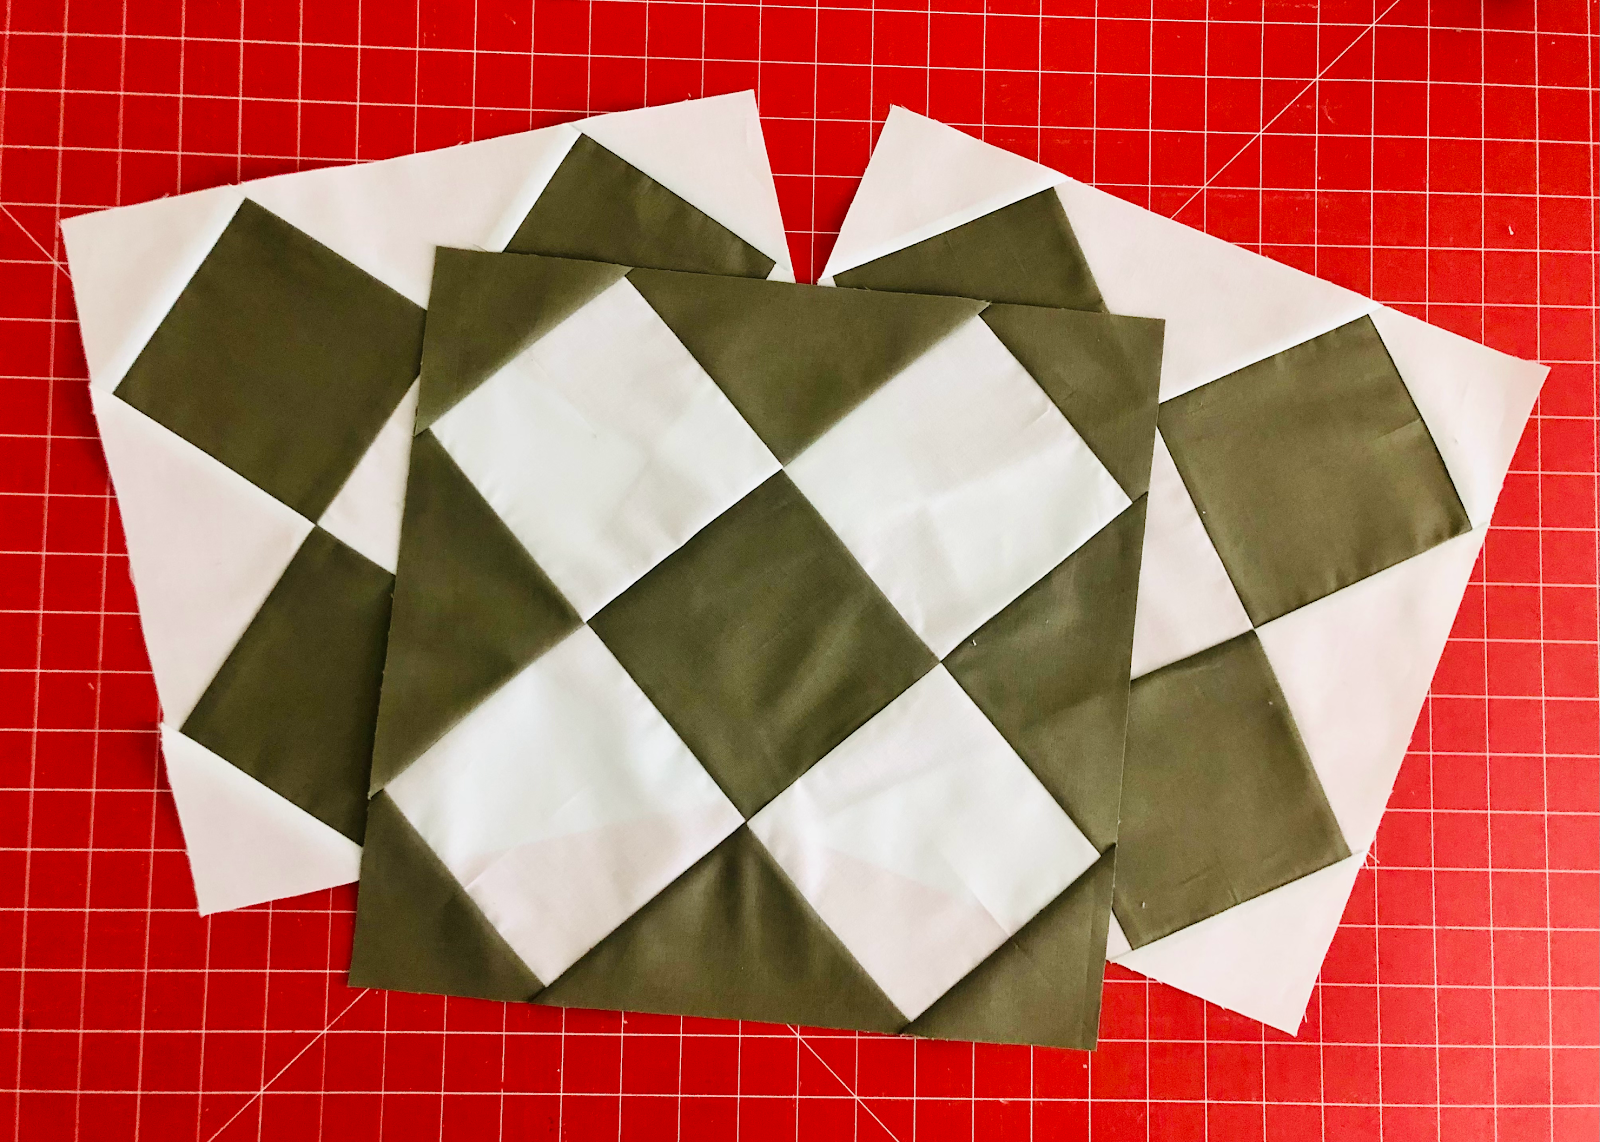
KMQG Block of the Month 2022: Block 10, Mosaic


Congratulations to everyone who has been quilting along with our 2022 block of the month series -- we've made it to the final block! We're keeping things nice and easy with the Mosaic block, which consists of just 16 HSTs!

If you would like to make 8-at-a-time half-square triangles, you can follow this tutorial. The HSTs need to be trimmed to 3 1/2" before assembling the block. If you would rather make 2 at a time, cut 4 1/8" squares to start with and you'll have enough extra to trim the HSTs to size.

If you're following the two-color prompt, the only adjustment you'll make is in how you position the HSTs to get the opposite layout.

Saturday, October 15, 2022

KMQG Block of the Month 2022: Block 9, Geese in a Row


We're finally approaching the end of our block of the month series, and the penultimate design is Geese in a Row. This block is unique in that the geese are pieced in rows the width of the block, with no half-square triangles.

***When sewing this block, it's important to take care with your seam allowances. They should be a scant 1/4" -- and if you're really worried, I'd shave another scant off of that! There is no excess built into the vertical measurement of this block, although you will have a little extra width to trim it to 12.5" unfinished at the end. You may want to sew two practice strips and piece them together, making half a block, to check your seam allowance and sizing. 


Cutting Instructions for ONE BLOCK:

Color A: Four pieces 3.5" x 6.5" -- these are the center geese

Color B: Eight pieces 3.5" x 7" -- these go on either side of the geese


Piecing Instructions

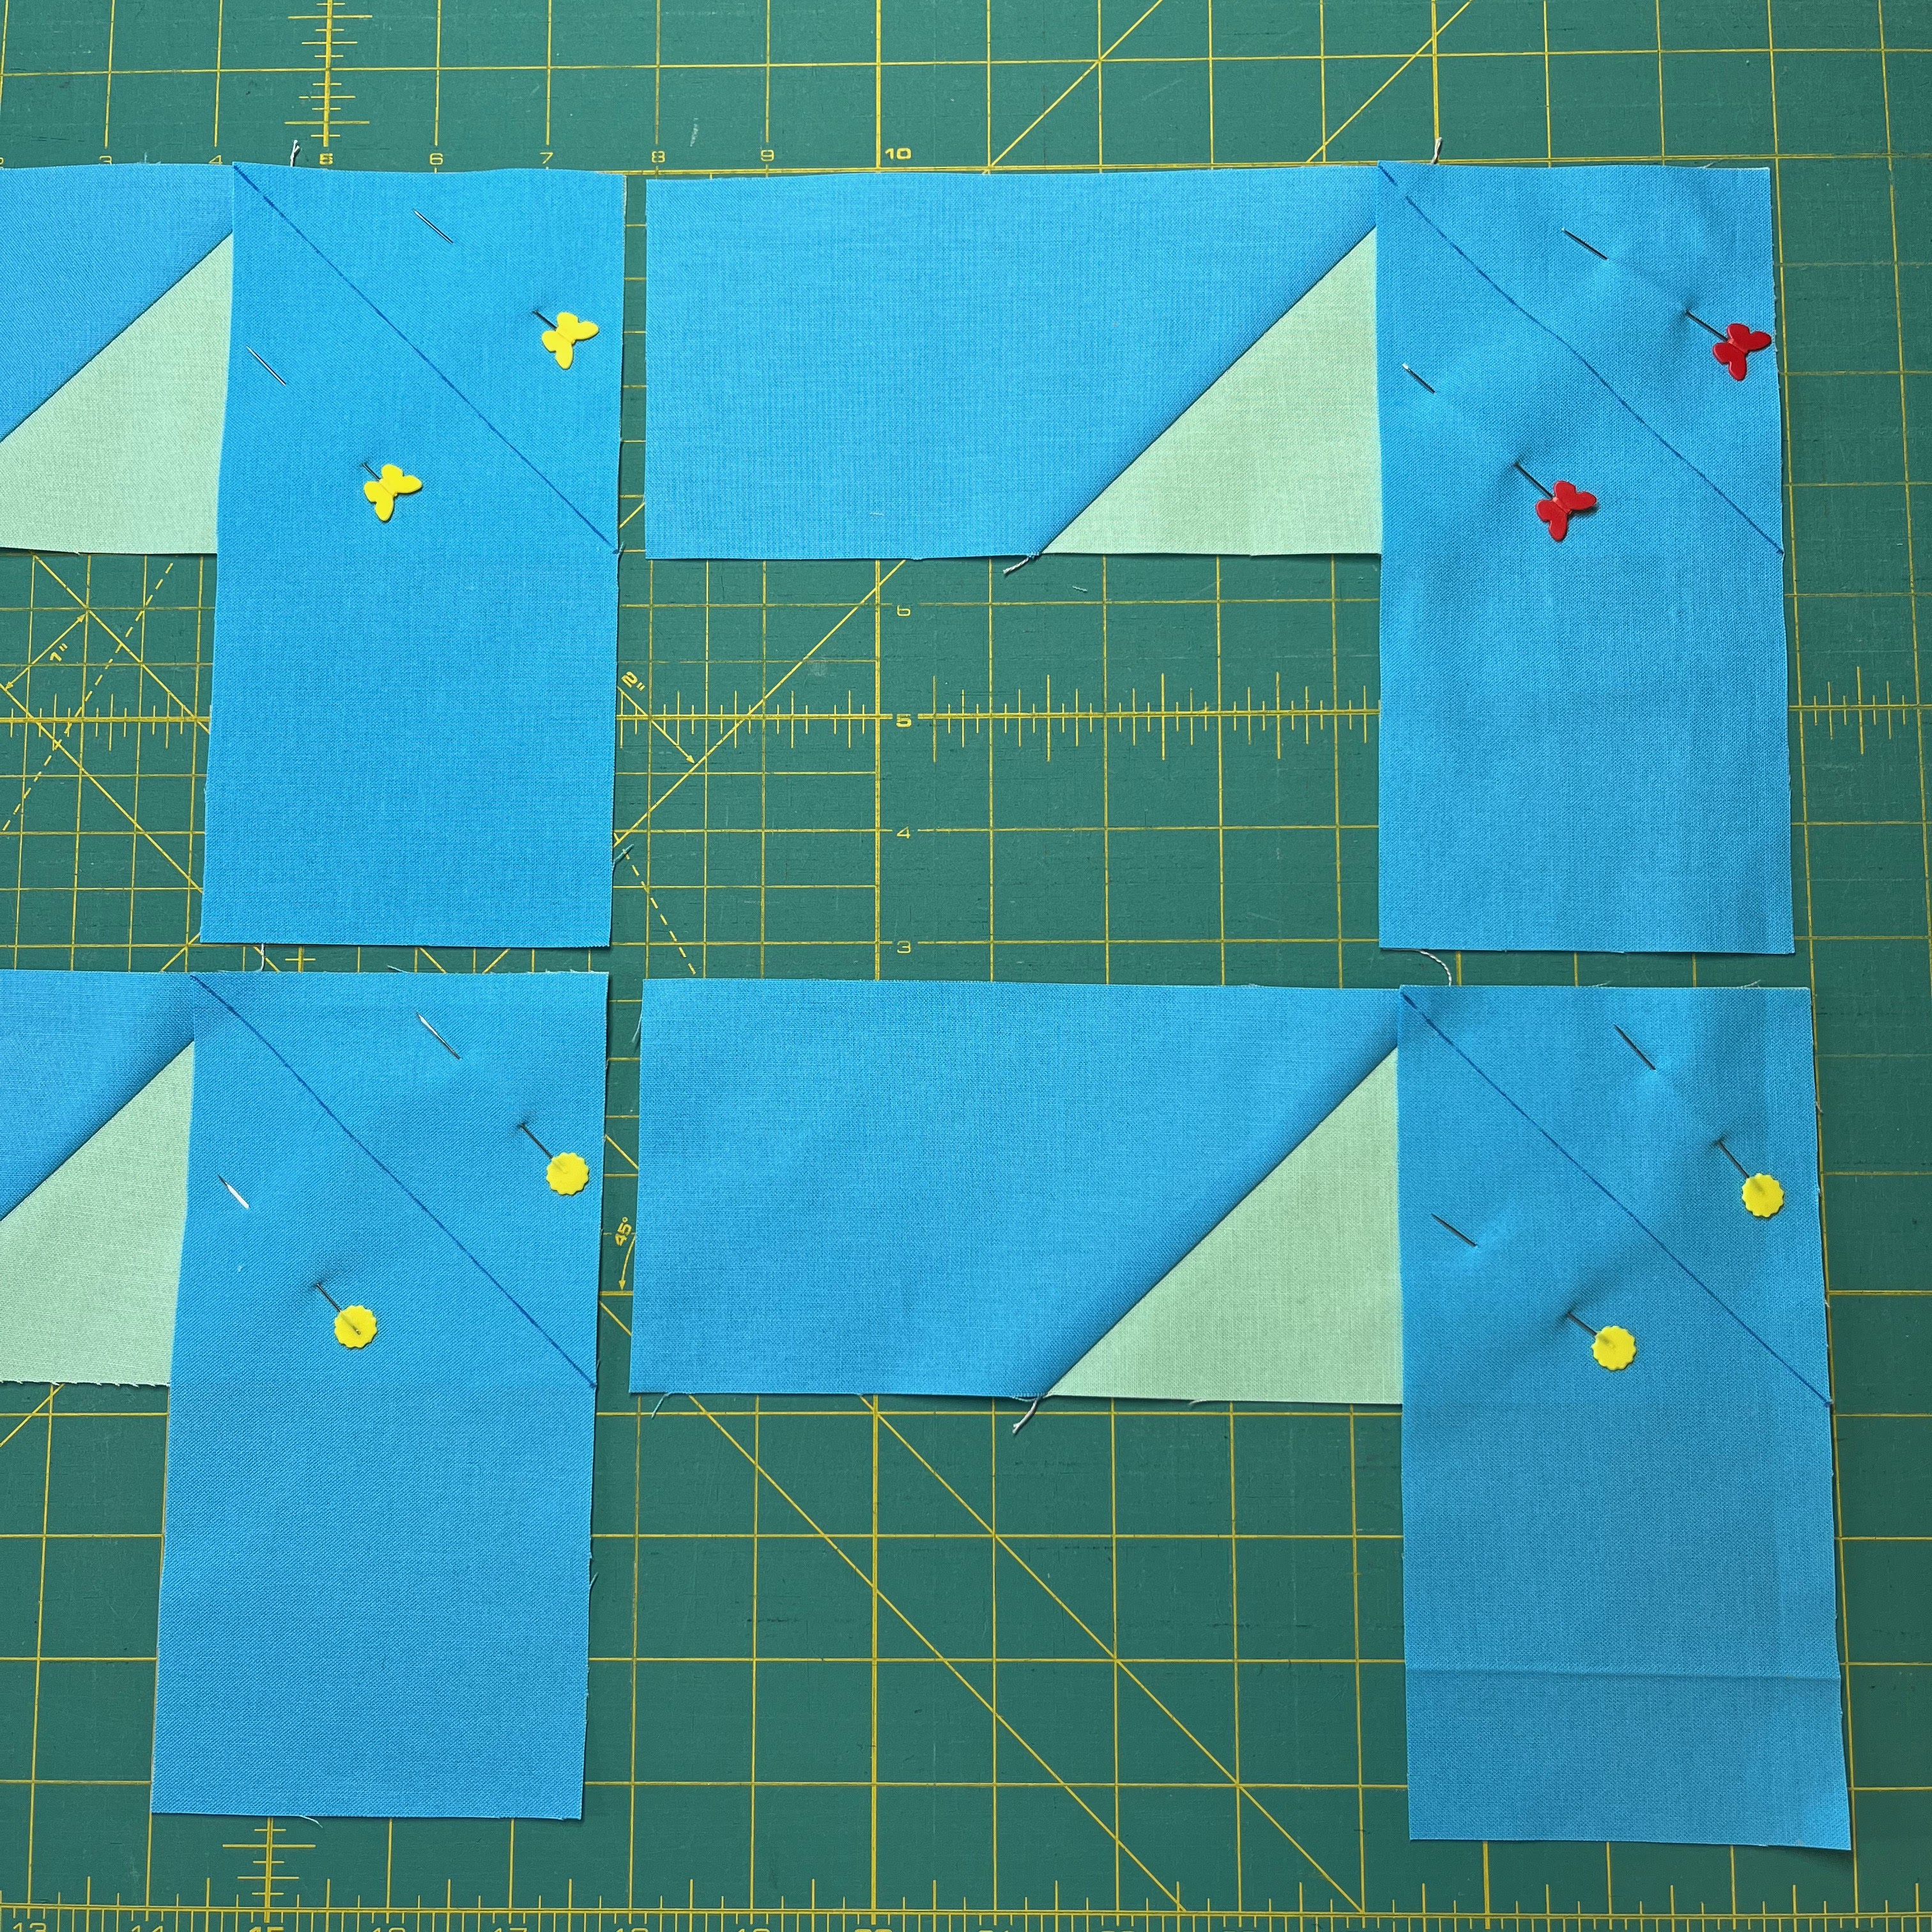
1. Lay out the 4 color A rectangles and position 1 color B rectangle perpendicular on the right-hand corner, and extending up as pictured. Draw a line from upper right to lower left where the two pieces intersect, as pictured.


2. Sew on the line and then trim the corner off with a 1/4" seam allowance.


3. Open and press toward the color B strip.

4. Flip the pieces around so that the color B strip you've just sewn is on the left. Position the other color B strip on the opposite corner of the color A strip, perpendicular but extending down this time. *** It's important to get the positioning correct or else you won't achieve the flying goose shape. Draw a line from upper left to lower right where the two pieces intersect, as pictured. You can start to see the goose shape at this point.


5. Sew on the line and then trim the corner off with a 1/4" seam allowance.


6. Open and press toward the color B strip to reveal your 4 flying goose strips.


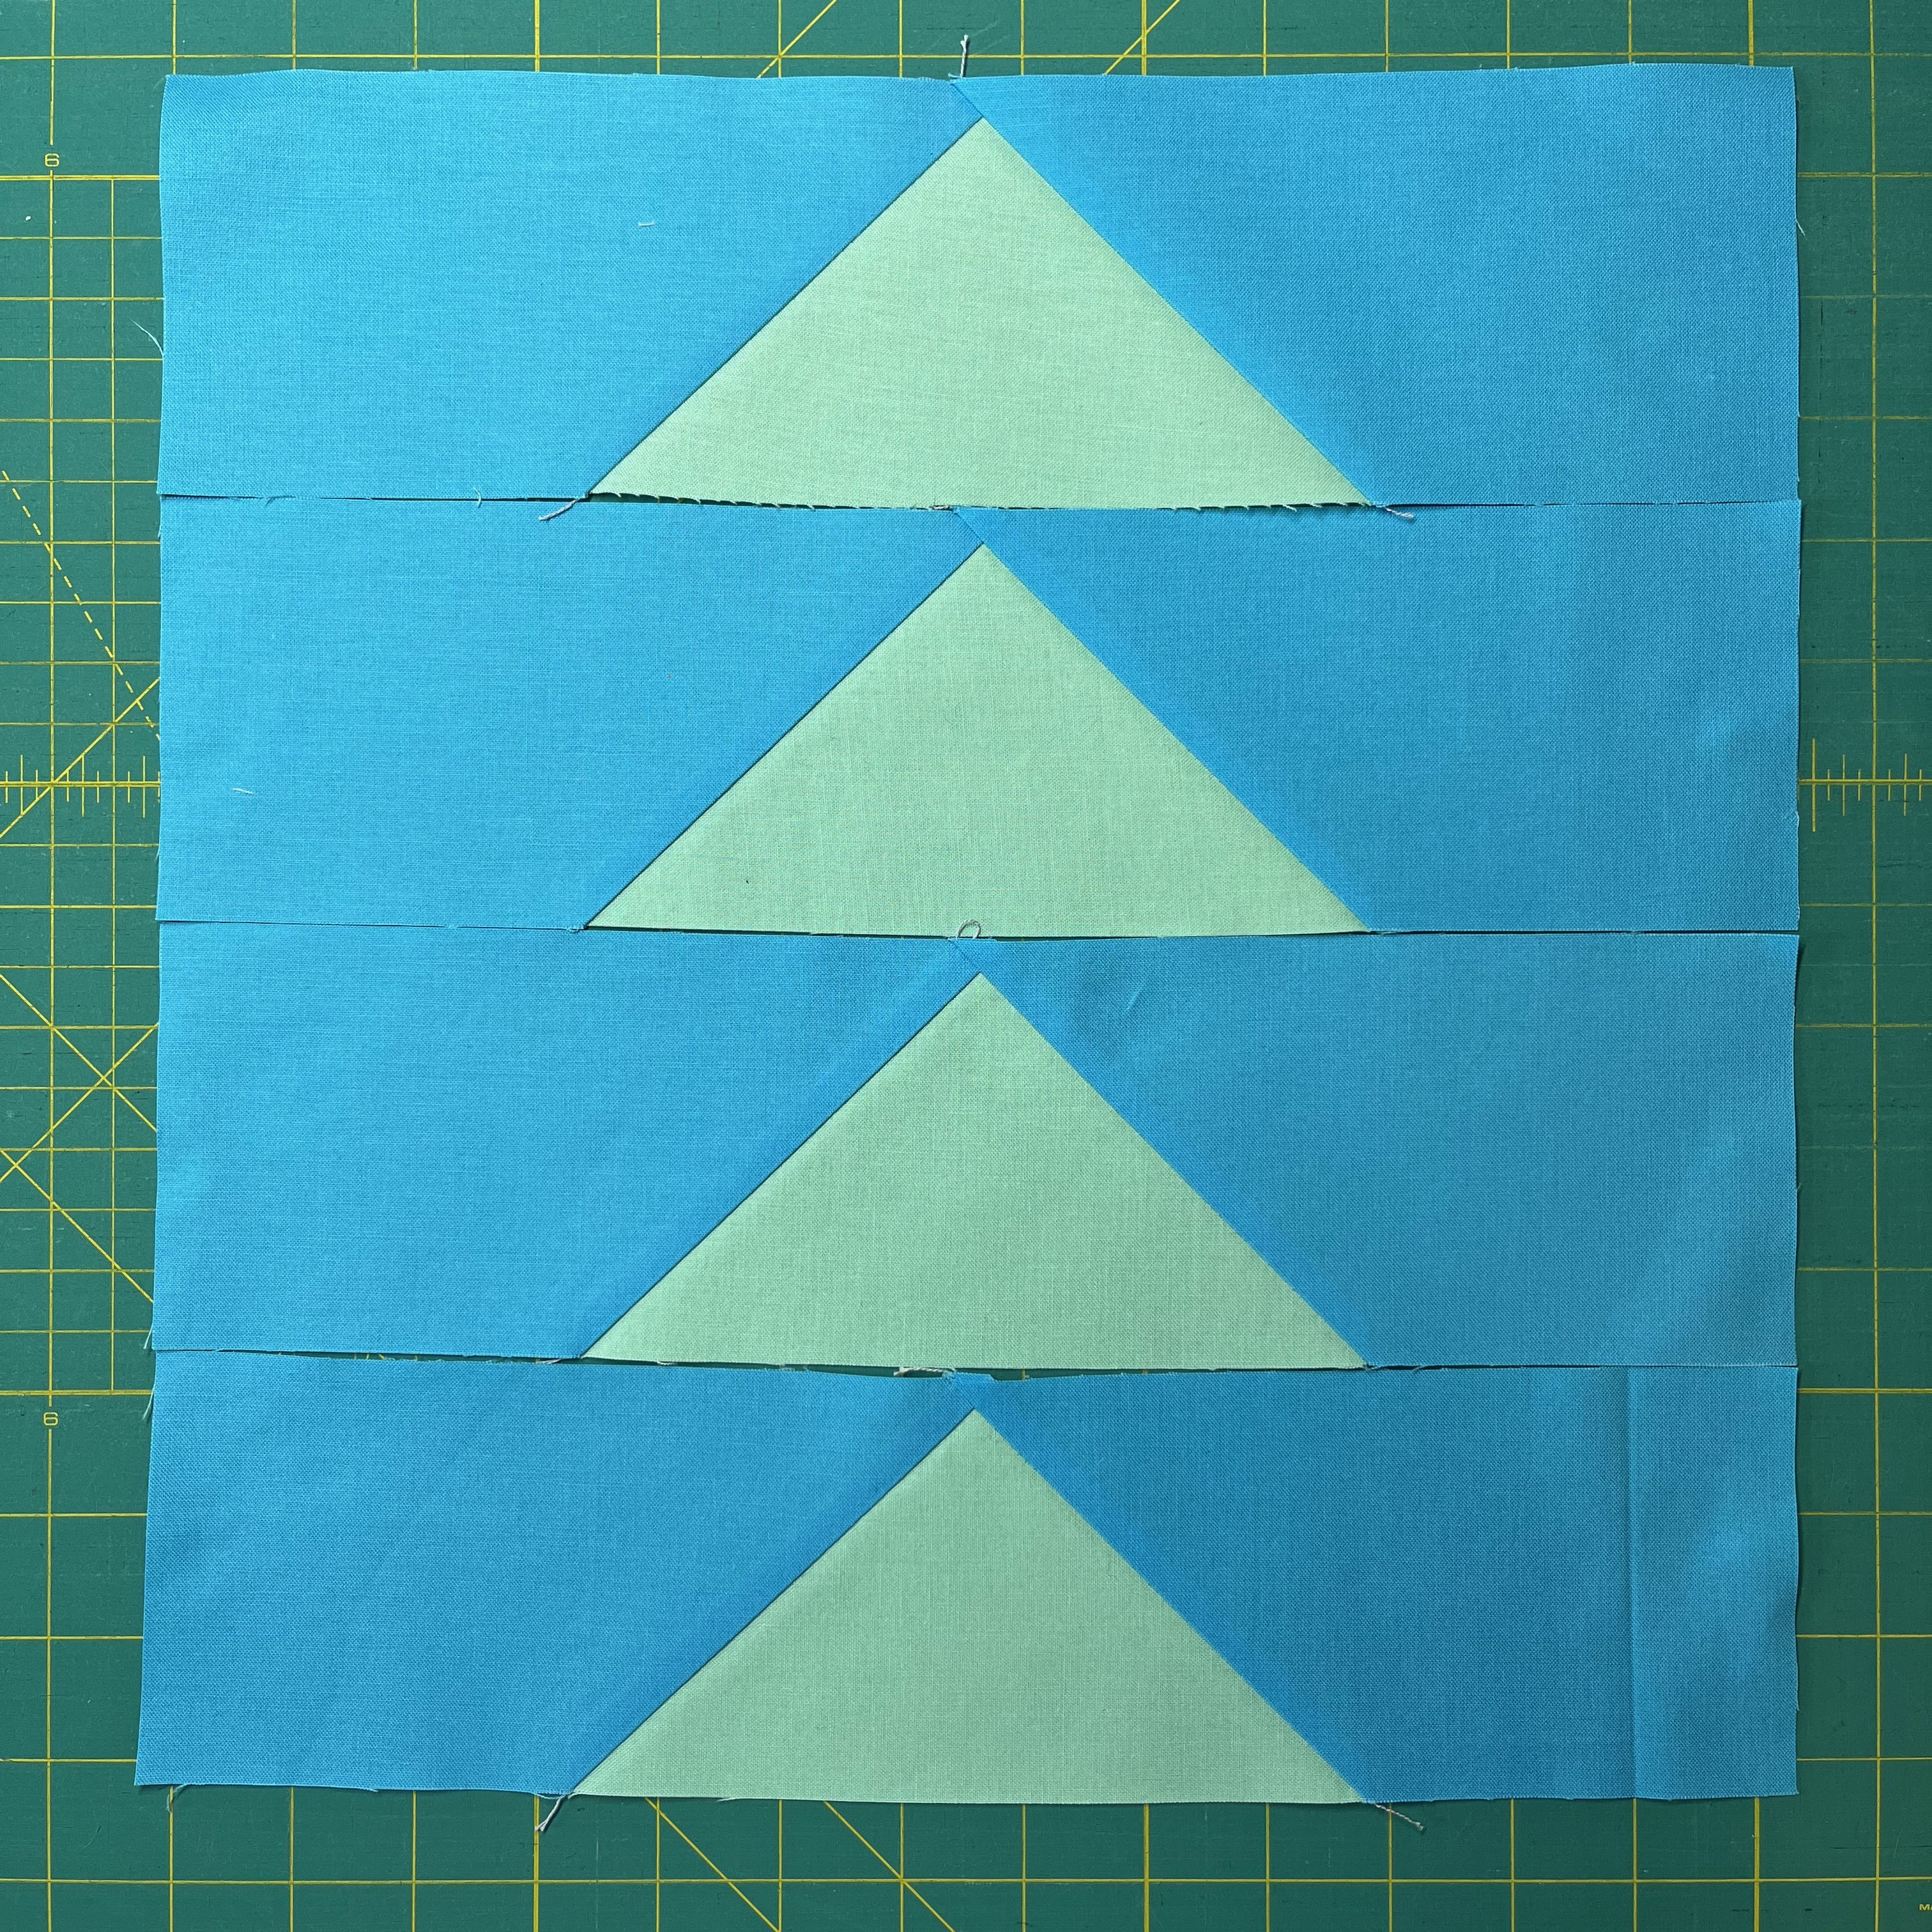
7. Fold each strip in half to find the center and finger press. Then align the centers and sew the strips together. Press seams toward the top of the block, as pictured.


8. Your block should be 12.5" x 13-ish". Trim the width for a 12.5" square unfinished block.


KMQG Block of the Month 2022: Block 8, Circle in a Circle


This post is a little belated (sorry!), but September's design for our block of the month is a circle in a circle, or a ring, or whatever you want to call it! This block can be cut using templates (if you have them) and pieced in quadrants, appliqued onto a solid background (like shown above), or created using any other method you may like. Choose your own adventure!

We've provided some instructions for the pieced method here, but you will need to buy or make your own templates.

Sunday, August 21, 2022

KMQG Block of the Month 2022: Block 7, Crossed Canoes


Ready for Block 7 of our block of the month quilt-along?? This is a fun one that uses foundation paper piecing for precise results -- it's bold and graphic and so easy to make because ALL 3 BLOCKS ARE EXACTLY THE SAME! That's right, no figuring out how many of this color for this block vs. for that block. Nope, just make 3 identical blocks and admire your handiwork.

It's called Crossed Canoes, and we're using an FPP template (and instructions, if you need them) from Art Gallery Fabrics.


NOTE: When printing off the templates, make sure that your printer is set at 100% -- you don't want to enlarge or reduce the template at all or the blocks won't fit together properly and your unfinished block won't be 12.5".

I've done a little of the prep work for you to hopefully make this block a little easier to make in our two-color format.

1. Print/copy 12 paper templates. (Each block requires 4 templates, so 4 x 3 blocks.)

2. Mark the templates with color codes so that you can keep track of what color fabric goes where. You can see in the photo below that I used a B for blue and G for green. For each block, you'll have two templates marked one way and two templates marked in the opposite way. It's easy to get confused as you go along, so the marks will help.

3. To make all three blocks, cut the following from both of your two fabrics:
  • Six pieces at 3.5 x 8 inches (that's six of Fabric A and six of Fabric B)
  • Twelve pieces at 5 x 8.25 inches (that's twelve of Fabric A and twelve of Fabric B)
  • The scraps you remove from the two side pieces (2 and 3 in the template) can be used for piece 4 in the template. You may also have some scraps left over from previous blocks that will work here too.
4. Reduce the stitch length on your sewing machine for sewing the fabric to the paper. Mine is less than 2. The smaller stitches will make it easier to remove the paper at the end (more perforations) and cause less stress on your stitches.

5. I recommend leaving the paper on your blocks until we're finished with the monthly block releases and ready to sew everything together. The paper will stabilize the bias edges for now.

I took some process photos as I made my blocks, if you prefer more visual instructions.


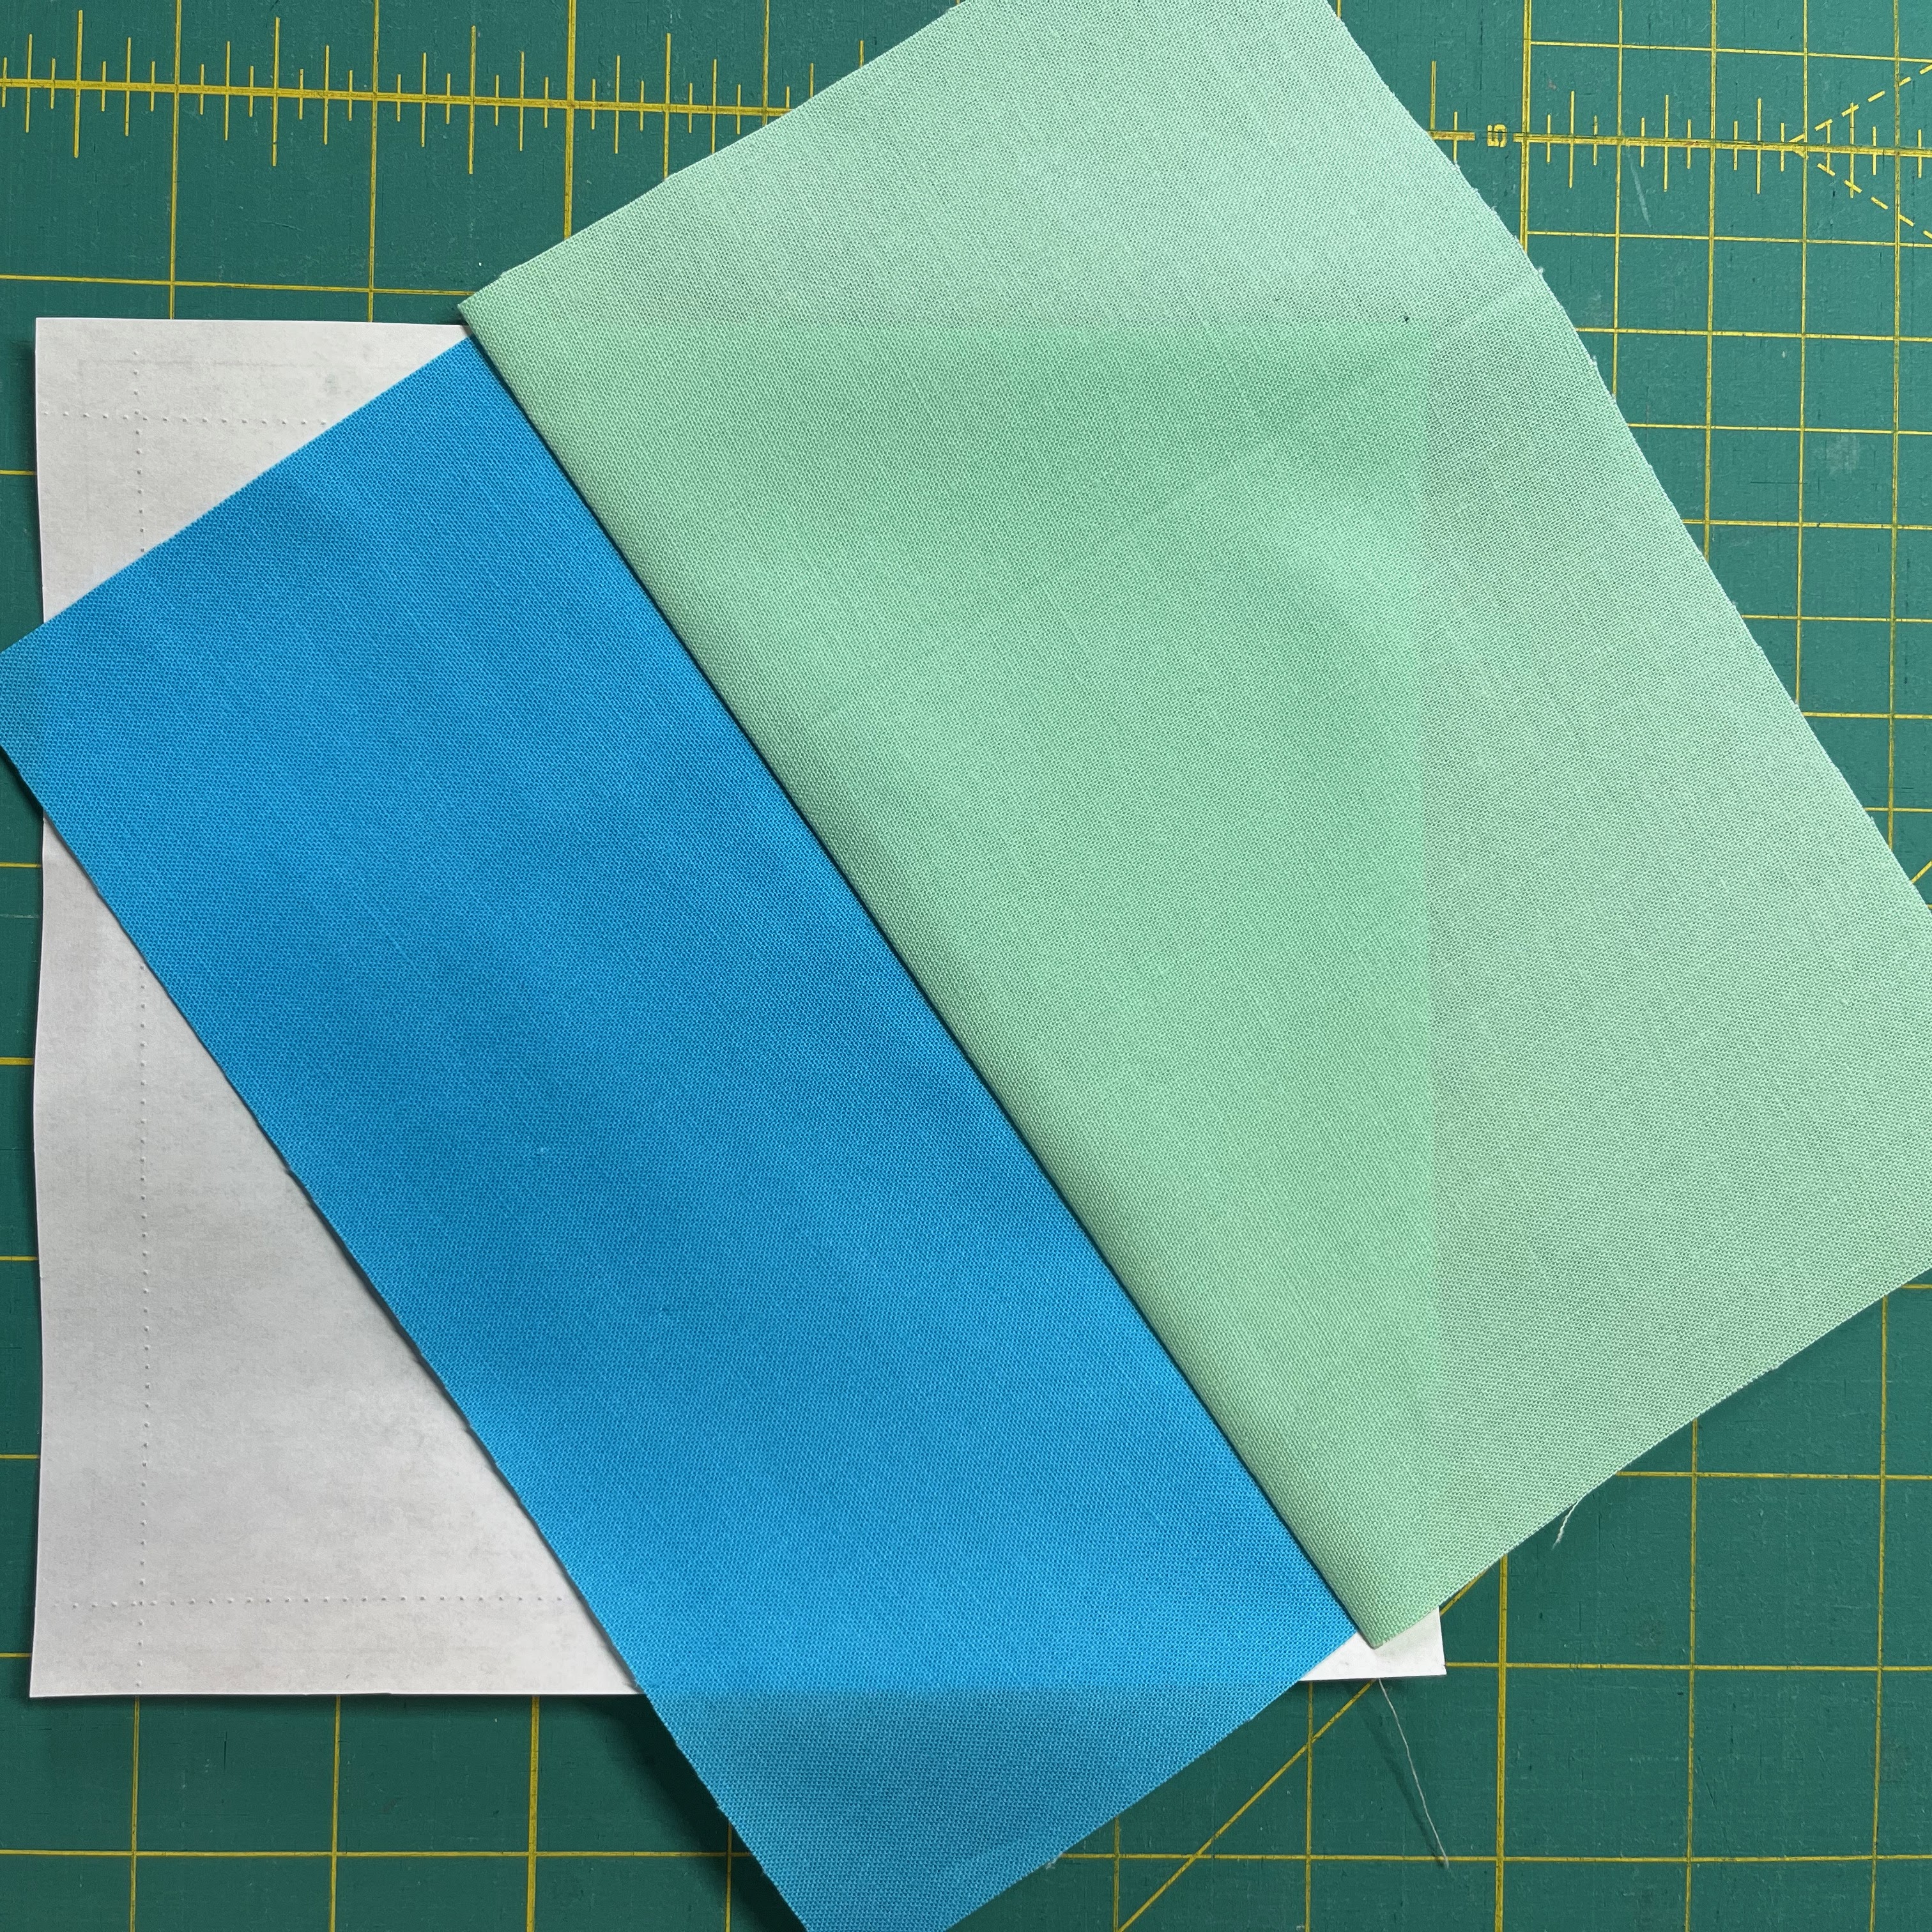
Piece 1 on the back side of the template. Use a dab of glue stick to hold it in place.


Lay piece 2 on top of piece 1, aligning that right edge where you will sew the first line.


Flip the paper over to sew on the line between pieces 1 and 2. Flip it back over and it looks like this.


I like the fold the paper back along my stitching line and trim the seam allowance to reduce bulk and any shadowing on the front side.


Flip piece 2 over the stitching line and press.


Before adding the other side piece (it doesn't matter if you do 2 and 3 in order), I like to fold back the paper along the line I'll stitch and trim the piece 1 seam allowance to 1/4". This reduces bulk and lets you line up the side piece exactly with the edge.


Place the next side piece along that trimmed piece 1 edge.


Flip the template over to stitch on the line. Flip it back and it looks like this.

Press the side piece open like you did with the first one (I missed a photo of this!)


Again, I like to fold back my next piece and trim to 1/4".


Put the small triangle for piece 4 in place. (If you want to trim some of the excess side pieces away, you can use them for this piece.


Stitch on the line, flip it over and it should look like this.


Flip and press


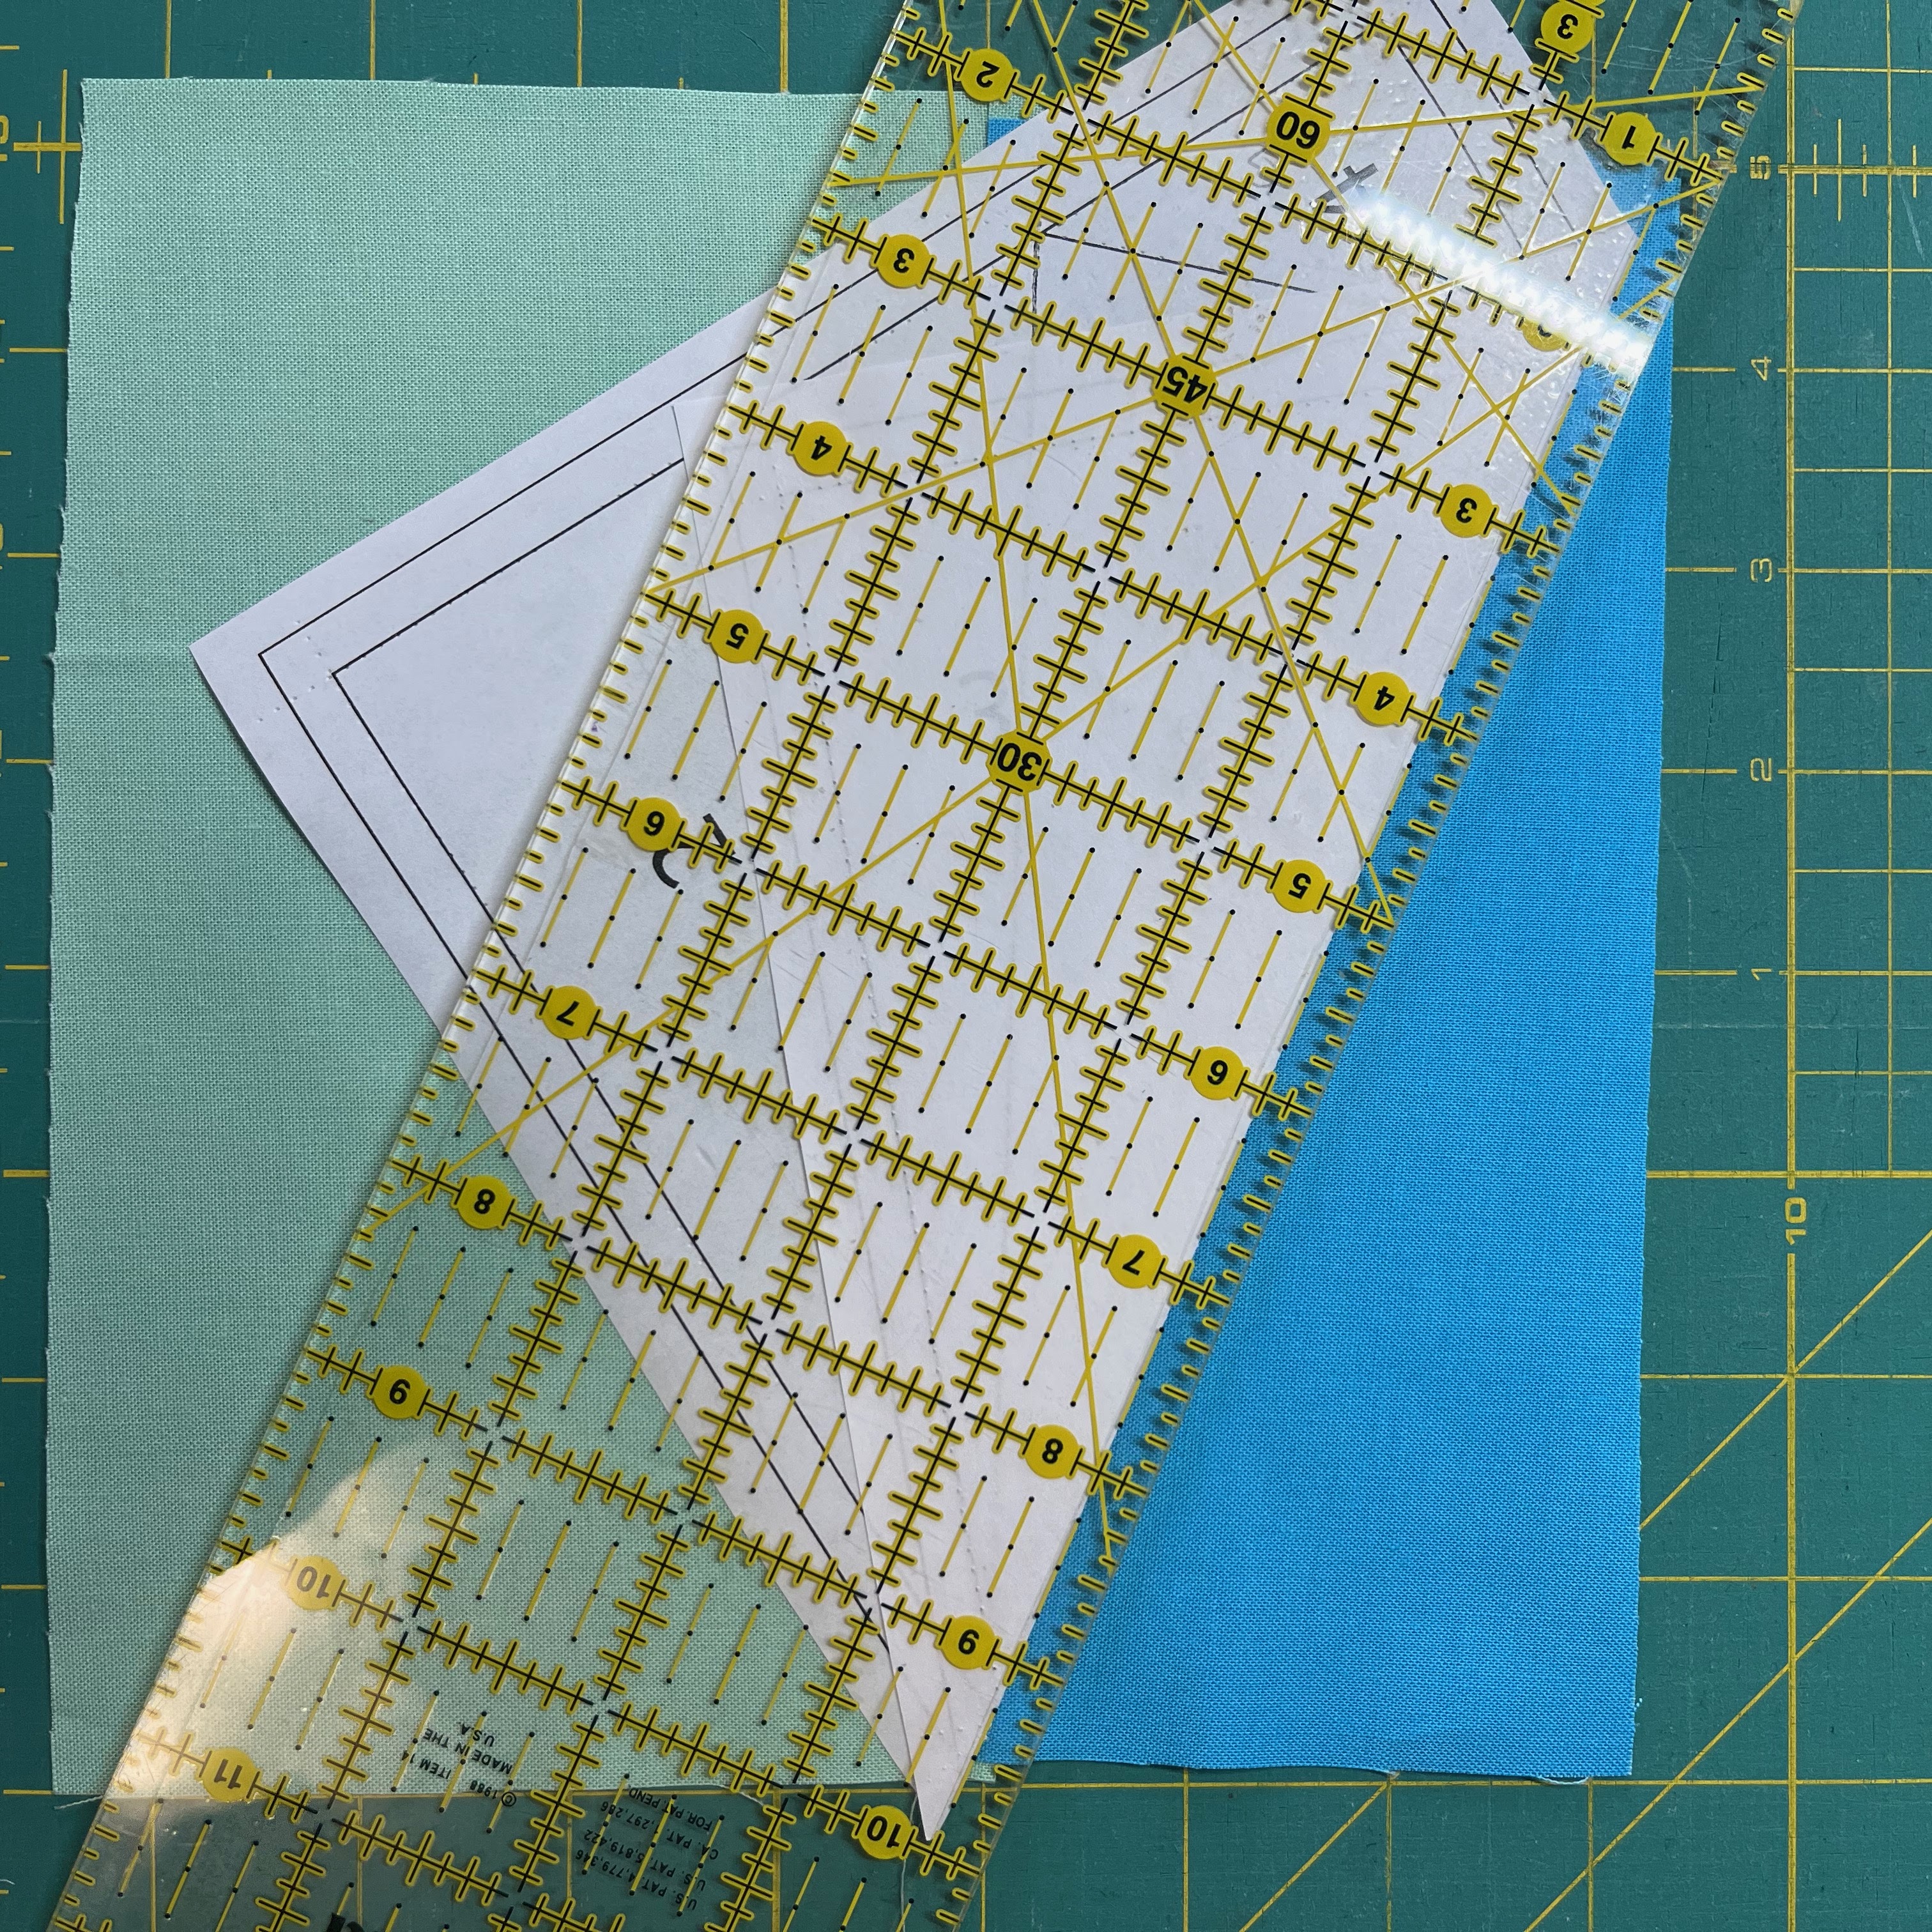
Trim to the outside line


Lay out the four blocks and sew together in pairs. Press the seams open for the flattest result. Then sew the two rows together. 


Saturday, July 16, 2022

KMQG Block of the Month 2022: Block 6, Sawtooth Star


It's time for Block 6 in our Block of the Month Quilt-Along! We found this one posted by the Boulder Modern Quilt Guild as part of their 2018 Block of the Month series, and we love that it's so graphic and a perfect example of the "modern traditional" characteristic of modern quilting.


According to the Boulder MQG, the Sawtooth Star has been around since the late 1800s and is a very iconic, classic quilt block. The block uses squares, rectangles, single flying geese (FG) and half-square triangle (HST) units. This version uses two colors to create a simple divided variation.

This block is super fun and easy to put together. The instructions from the Boulder MQG can be found here: https://bouldermqg.com/2018/01/27/february-sawtooth-star/. The tutorial includes links for additional instructions on creating the HSTs and flying geese. You can also access a cheatsheet here. 

TIPS!
  • It's super easy to make 3 blocks this time -- just multiply all the cutting instructions by 3! Make 3 identical blocks, and when they're finished, you can flip one or two of them around for the effect of opposite color placement without doing any extra work.
  • The HSTs need to be trimmed down to 3.5-inch squares before you assemble the block. If you have any HST units left from your April Mod Square block, you can use them for this block.
  • When sewing flying geese, it helps to sew just alongside the marked line (toward the corner you will cut off). That gives you a scant 1/4" seam allowance and helps ensure your geese aren't too small.
  • The Add-a-Quarter ruler is helpful when trimming flying geese.


Monday, June 20, 2022

KMQG Block of the Month 2022: Block 5, Drunkard's Path


It's time to share the next block in our Block of the Month Quilt-Along. You've made it halfway through the series!

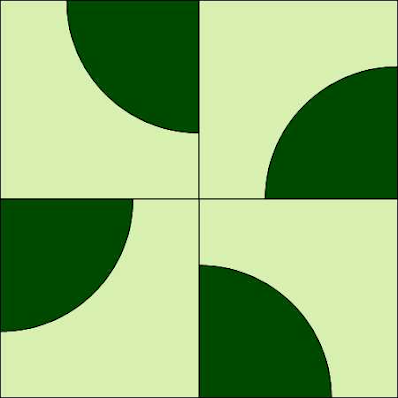
Sarah put this one together for us (thanks Sarah!) -- it uses 4 Drunkard's Path blocks set in a sort of spinning arrangement.

In order to make the four sections of this block, you need Drunkard's Path templates -- one for the inner portion and one for the outer portion.

You can find instructions to make the block here, along with an option to purchase templates in several sizes, including 6.5" unfinished.

If you'd like to make your own templates, this tutorial walks you through how to do that. Remember that your unfinished block size is 12.5", so you need templates to make a 6.5" unfinished square.

There are also templates in the book A Quilter's Mixology by Angela Pingel, and we're sure that there are also templates in other books that feature a Drunkard's Path block. If any KMQG members have trouble finding templates or are unable to make their own using the resource above, they can reach out via email for assistance.

Sunday, May 22, 2022

KMQG Block of the Month 2022: Block 4, Modified Granny Square


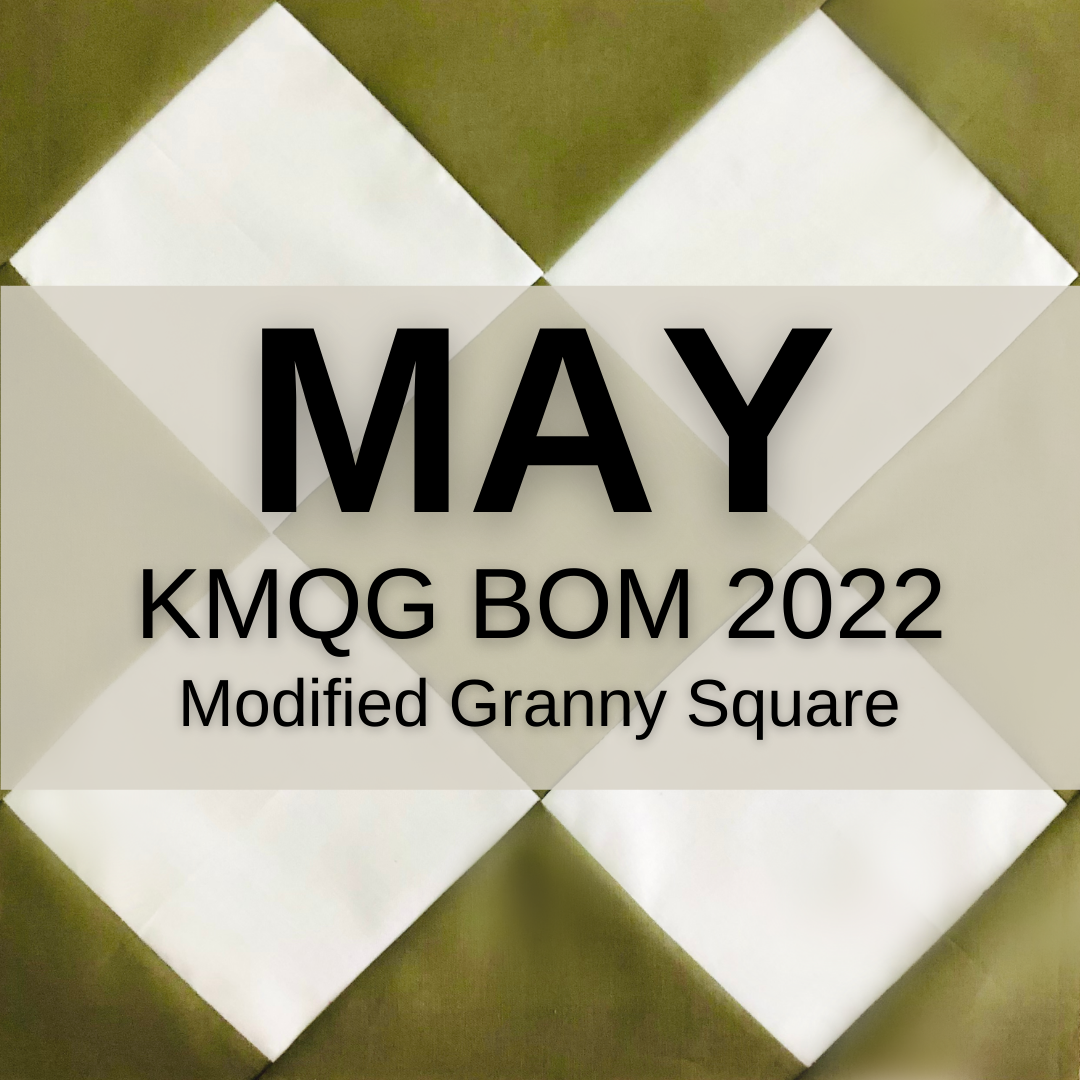
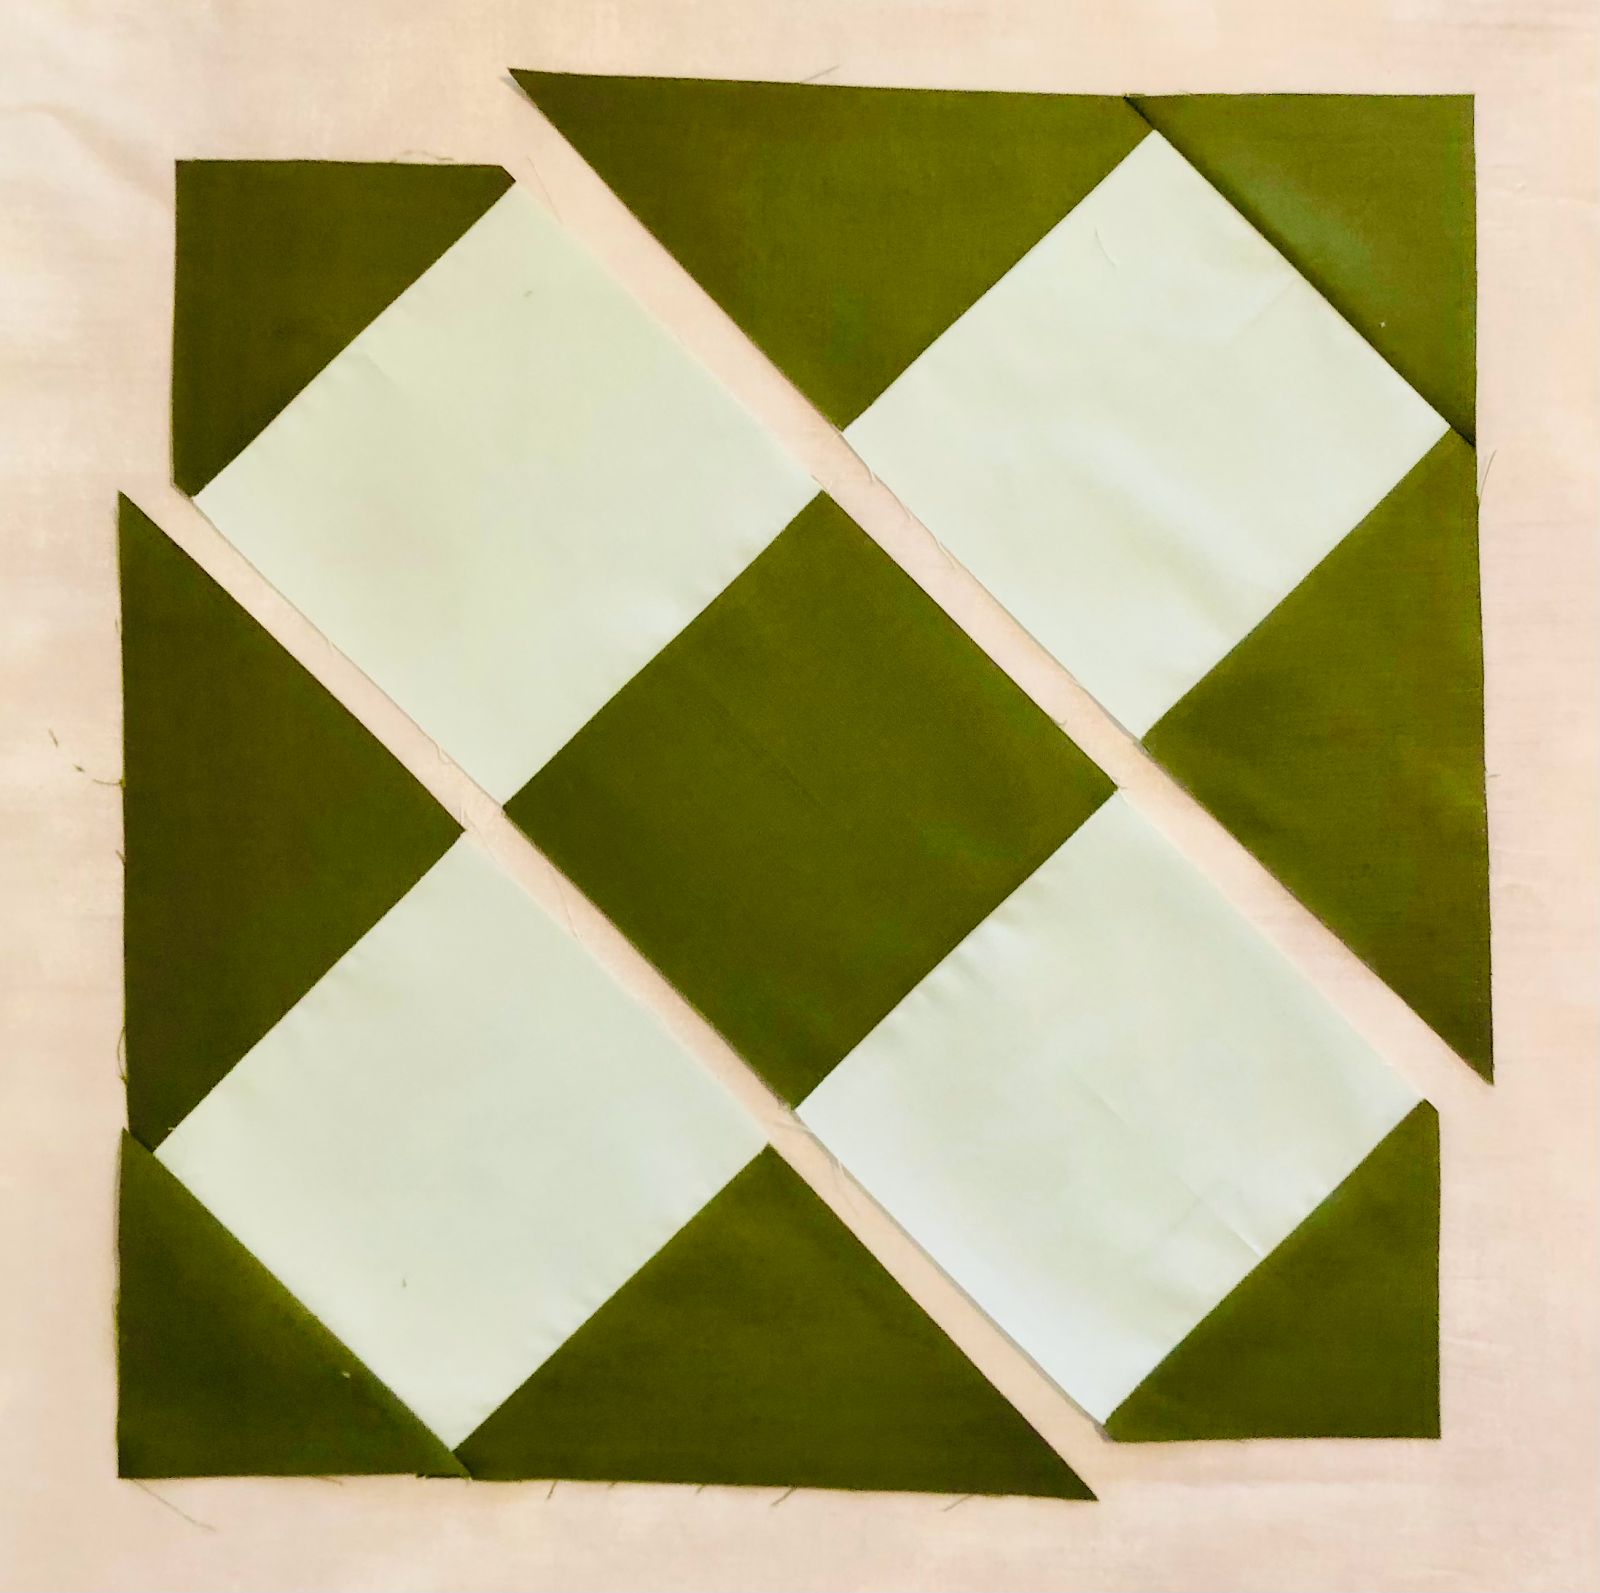
May's Block of the Month is a Modified Granny Square (reminiscent of traditional crocheted granny squares). The tutorial was created by KMQG member Sarah Elliott, @stitchologiesarah.


Image

Instructions are for making one block.

Tips: 

  • Be precise with your cutting and piecing.

  • Sew with a scant 1/4” seam to preserve points.


Step 1: Cutting


FABRIC A (BACKGROUND - dark green in tutorial): 


(1) 7-1/4” square

Subcut across both diagonals for 4 quarter-square triangles (QST)

(2) 3-7/8” squares

Subcut both blocks across one diagonal for 4 half-square triangles (HST)

(1) 4-3/4” square


FABRIC B (light green in tutorial):


(4) 4-3/4” squares


Step 2: Sewing sections

Image


For Section 1 (upper right corner), you will need:


  • Fabric A - (2) HSTs, (1) QST

  • Fabric B - (1) 4-3/4” square


  1. Sew (1) HST to each side of the Fabric B square.

  2. Press toward the Fabric B square.

  3. Sew (1) QST to the short edge of the Fabric B square.

  4. Press toward the QST.

  5. Repeat to create Section 3 (lower left corner).


For Section 2 (center strip), you will need:


  • Fabric A - (2) 4-3/4” squares

  • Fabric B - (1) 4-3/4” square, (2) QSTs 


  1. Sew one Fabric B square to each side of the Fabric A square.

  2. Press toward the Fabric B squares.

  3. Sew one Fabric A QST to each end of the strip.

  4. Press toward the Fabric B square.


Step 3: Assembling the block


  1. Lay out the three sections of the block.

  2. Sew one triangle unit to the center strip unit, nesting the seams to ensure the blocks line up.

  3. Press toward the triangle unit.

  4. Sew the other triangle unit to the opposite side of the center strip unit, nesting seams.

  5. Press toward the triangle unit.


We recommend not trimming the block to size until all blocks in the series have been completed.


Image

Sunday, April 24, 2022

KMQG Block of the Month 2022: Block 3, ModSquared


April's Block of the Month is called "ModSquared' and comes from the Modern Quilt Guild. You must be a member of the MQG to access this pattern. Login to the MQG site, click MQG Resource Library, and search "ModSquared."

It's a pretty quick pattern to cut and sew up, but there are a few things to keep in mind:
  • Use a scant 1/4" seam! This may be a good time to test your seam by measuring to make sure it is scant and not over 1/4" inch. A generous seam will produce a smaller block and will definitely mess with the square in a square in this block (more on that below).
  • HSTs: When you cut and sew the half square triangles, you will end up with extra HSTs that you can use in one of your other blocks. So you may want to cut and sew one block at a time to reduce waste, or make 4 blocks instead of 3 and keep the extra to see if you want to swap it into your finished layout in place of another block.
  • Square in a square: The pattern says to cut the inside square 3 1/4", but if you want to preserve the points in your square in a square, you need to cut the inside square 3 1/8". (That's one of the two light squares in the pattern. The outer triangles still come from a 2 3/4" square as the pattern directs.) Square in a square is not a forgiving block, though, so be aware that you will have basically nothing to trim it down to size (you'll just trim off the triangle points). We recommend pressing with starch before measuring and (barely) trimming the block to the 4 1/4" size indicated by the pattern.

Sunday, March 20, 2022

KMQG Block of the Month 2022: Block 2, Chain Link

This year, the Knoxville Modern Quilt Guild's annual quilt-along in a block of the month! From February to November, we will release one block pattern per month, and the plan is to make 3 of each block for a total of 30 blocks for the year. (That's a 5x6 block layout of 12-inch finished blocks, putting the finished quilt around 60x72 inches.)

Block #2: Chain Link

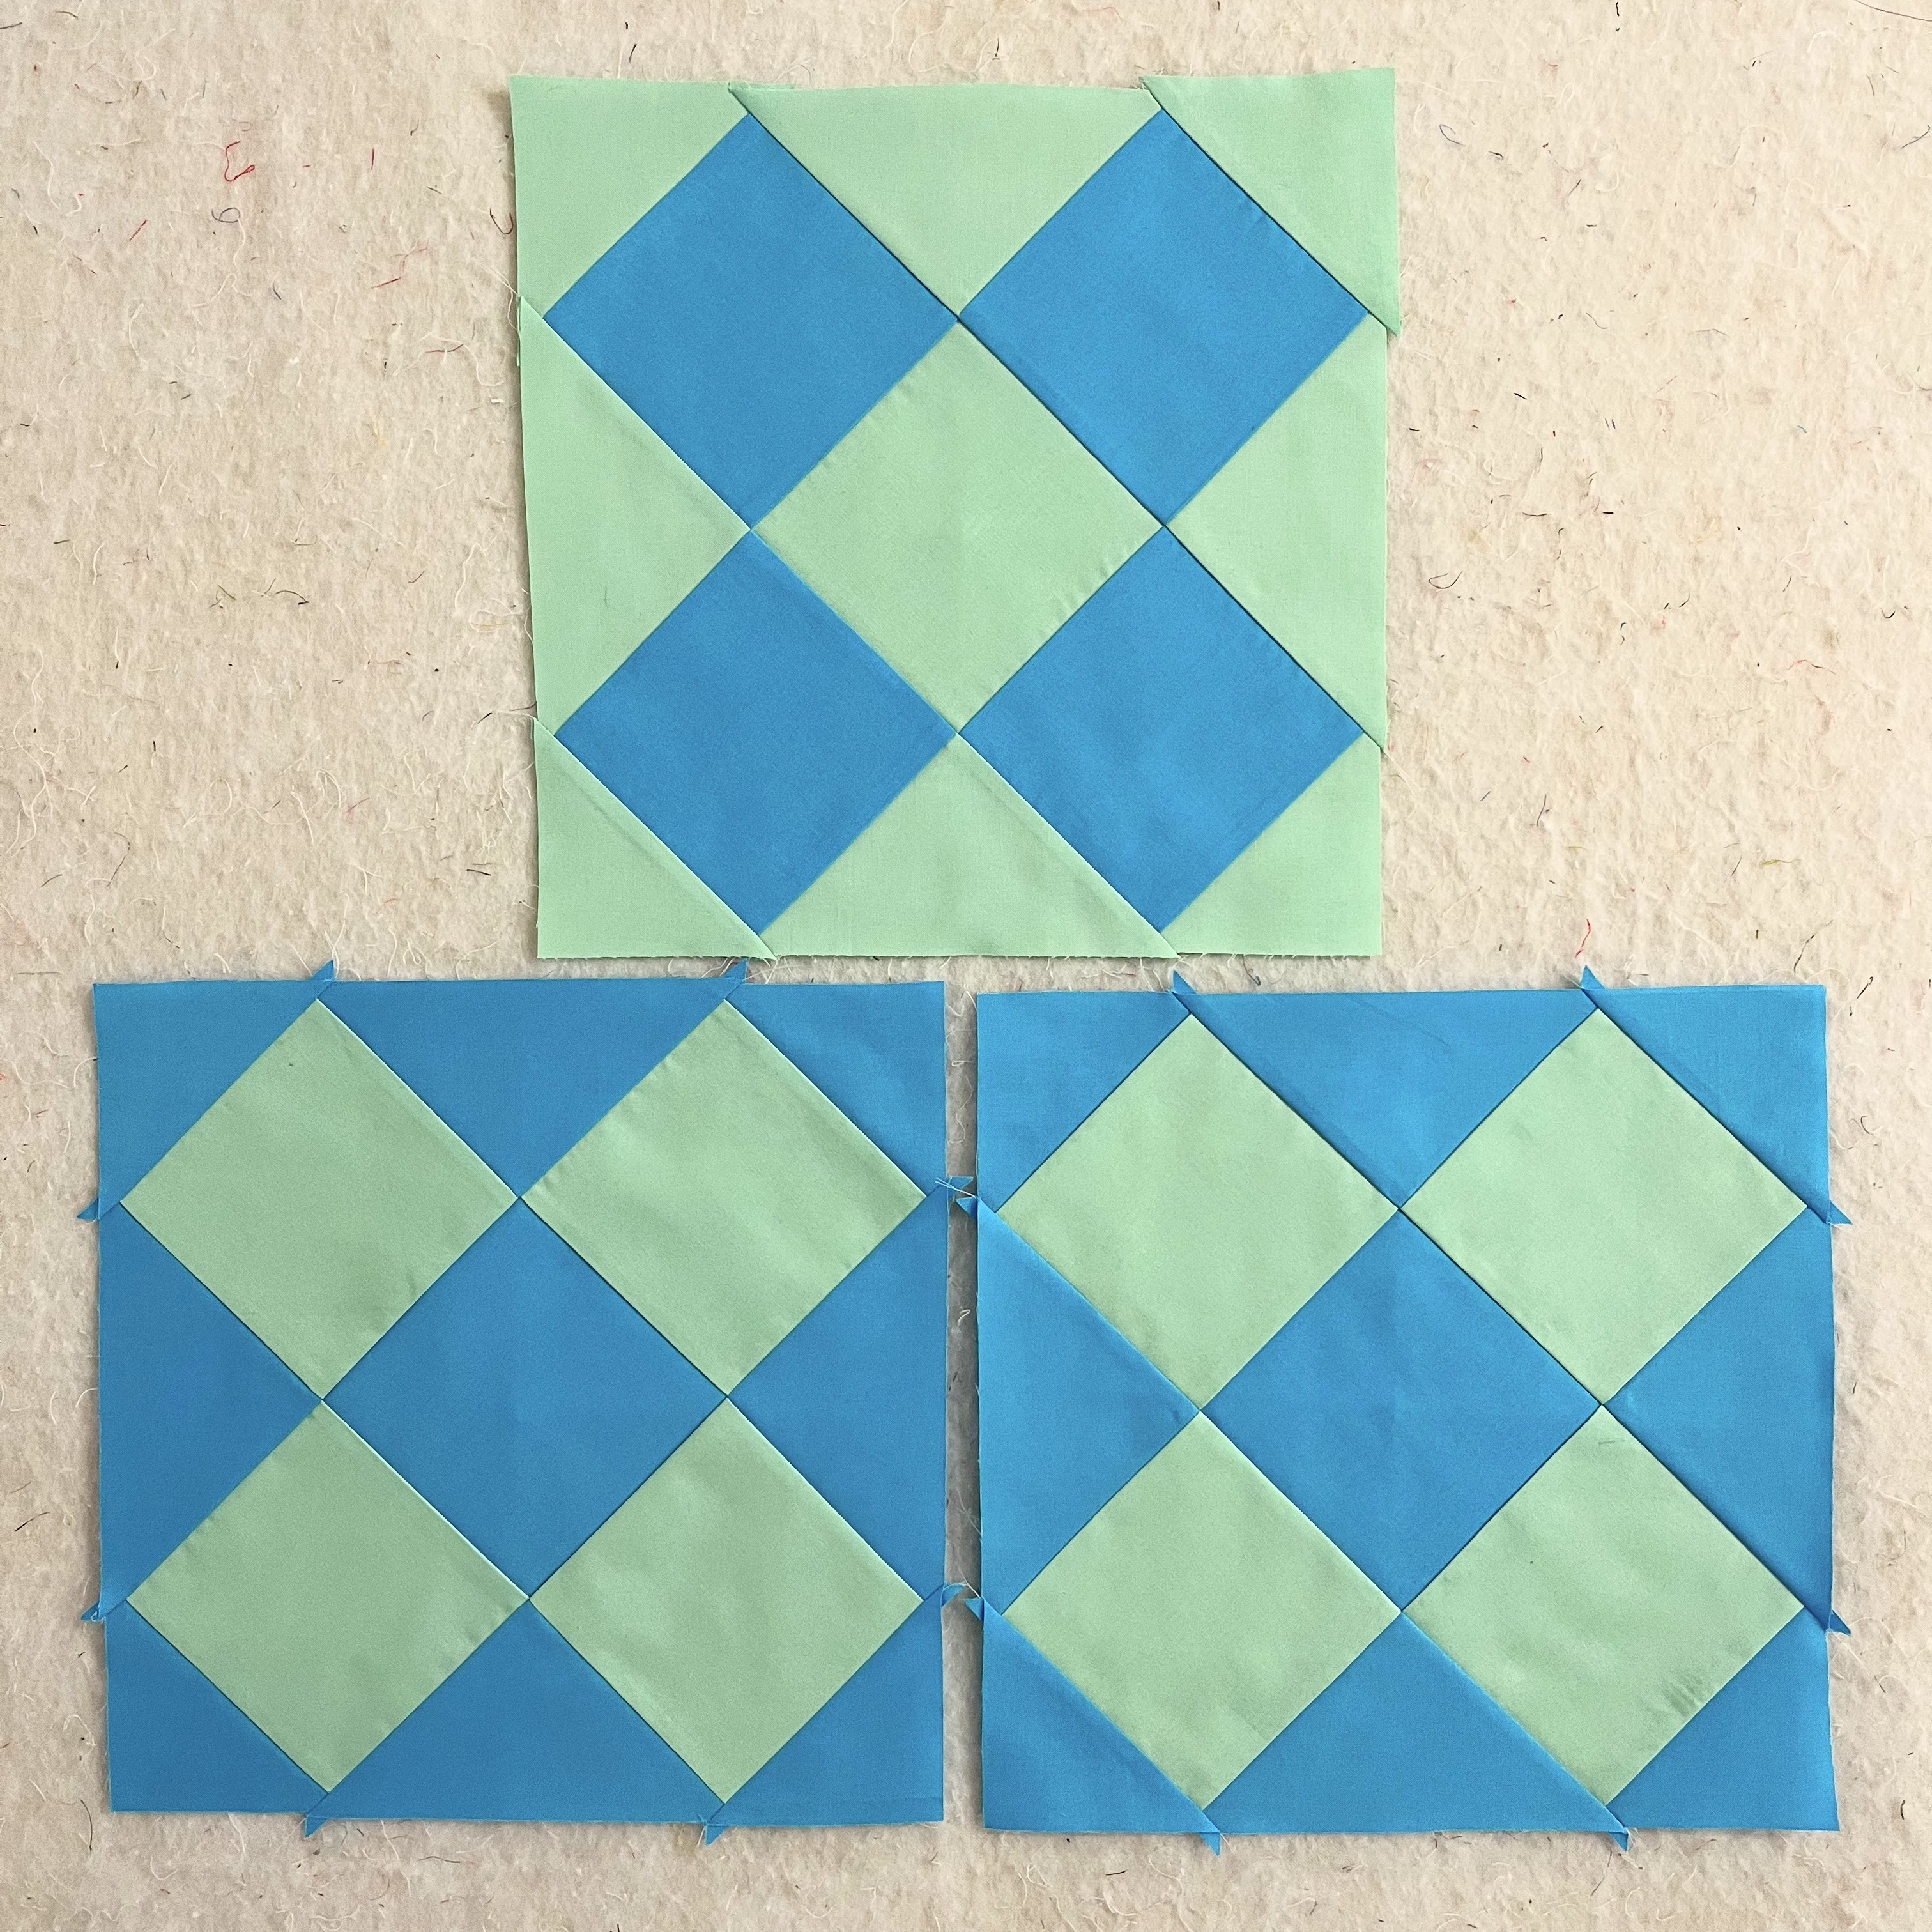
Our second block in the series is Chain Link, using a free tutorial from the Block Central index that has disappeared since this was first posted. The instructions are available here now.


These example blocks were made by Aimee: 

This block comes together quickly. One tool I would encourage you to have on hand is an Add a Quarter ruler, as I think it makes the cutting easier. Not necessary, but a handy thing to have now and for more blocks as we go throughout the year.

I made two blocks with the same color placement and then swapped the colors for the third block. I have no idea of the names of my fabric colors! Let's just say it's going to be a bright quilt when it's done!

Post your blocks to Instagram using the hashtags #kmqgbomqal, #kmqg and #showusyourmqg -- and look for Block 3 in April!

Sunday, February 27, 2022

KMQG Block of the Month 2022: Block 1, Graduated Geese

This year, the Knoxville Modern Quilt Guild's annual quilt-along is a block of the month! From February to November, we will release one block pattern per month, and the plan is to make 3 of each block for a total of 30 blocks for the year. (That's a 5x6 block layout of 12-inch finished blocks, putting the finished quilt around 60x72 inches.)

BLOCK #1: GRADUATED GEESE

The first block we've chosen is Graduated Geese, using a free tutorial from the Boulder MQG (thanks quilty friends!) 

The instructions are posted here: https://bouldermqg.com/2018/07/29/august/

If you're using only 2 colors in your quilt, you can make all 3 blocks the same or swap your color placement for variety. For example, here's the block made up in Kona Pond and Peacock:


Post your blocks to Instagram using hashtags #KMQGBOMQAL, #KMQG and #ShowUsYourMQG -- and look for Block 2 in March!